Adding Windows 7 to a Windows 2003 SBS domain environment
This is how you can add a Windows 7 to a Windows 2003 SBS domain environment. Unlike Microsoft’s previous desktop Operating Systems, the standard method of adding this OS to the domain will not work. This is because the system is much newer than its host server. Here is how it is done.
(I’m using my workplace domain as an example)
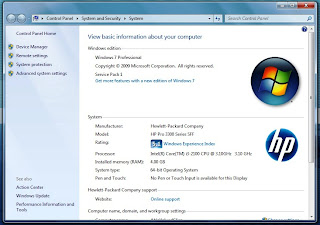
First – logon using an account with administrator privileges and then right click on My Computer and select Properties. Then select Advance system settings.
Step 1
The next step is to rename the computer and add it to a domain. There are two ways to do this. The first is by calling up a wizard using the Network ID button and the second is by manually adding it using the Change button. For this purpose I will use the later. Click on Change.
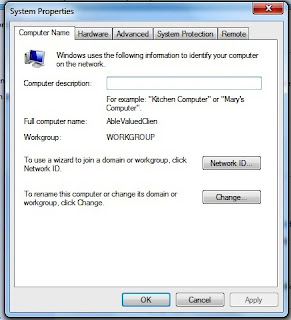
Step 2: Change /add domain
Now enter the computer name of your choice and add a domain. In this case I’m using OHE.local. If you try the domain without .local and it doesn’t work then I suggest adding it. Click OK when you are done.

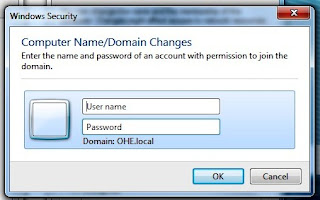
Step 3: Add to the domain
The computer will now ask for a domain username and password with administrator privileges. You must have this information. If you don’t, then contact your Systems Administrator.
Step 4: Verify and confirm, accept changes
Once the username has been verified then you will be added to the network.
Congratulations you now know how to add a Windows 7 computer to your Windows 2003 network /domain.

Your computer has now been added to the domain.
Alternatively, you could add the computer on the server. However, we will leave that for another post.
Related articles across the web


- PNG Government Introduces ICT Procurement Standards and Best Practices 2025 - October 16, 2025
- Understanding 5G: The Future of Connectivity - October 12, 2025
- Hackers Publish Qantas Customers’ Data on Dark Web After Third-Party Breach - October 12, 2025


